
I know a 9-year-old boy who is obsessed with Minecraft. He will talk your ear off about it while completely disregarding the lost and confused look upon your face. One day that I saw him he literally talked about it for 2 hours straight. He paused only to answer our questions about what he would like for a snack. So when I was scrolling through Ravelry the a couple weeks ago and saw this beauty by Katherine Youngs of Own Two Hands. I knew I must make him one.
However, I had no desire to knit it. So I entertained some other possibilities for how to make a Minecraft blanket. A quilt? I think he might be too rough on it. What about fleece? Yes. Fleece would work. I went to Joann’s and got their anti-pill fleece since it was on sale. Following Katherine’s basic outline for the number of squares I needed and in what colors I purchased:
2 1/2 yd Black (20 squares + back/binding)
1/2 yd Gray (15 squares)
1/2 yd Mint (17 squares)
1/2 yd Celery (20 squares)
1/2 yd Lime (13 squares)
1/2 yd Spinach (24 squares)
1/2 yd Dark Citron (11 squares)
{Note: The anti-pill fleece is 59″ wide. If your fleece is narrower you will need bigger cuts of fabric.}
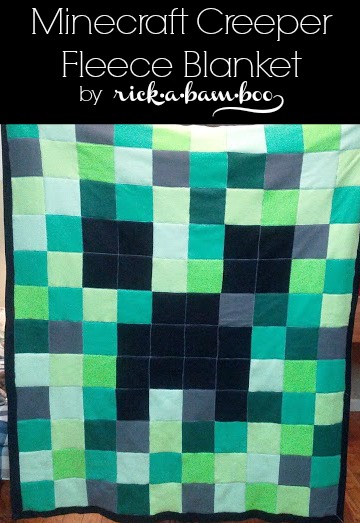
The creeper blanket is a 10 by 10 grid but I wanted mine to be a little longer so I did 10 by 12. My fleece was 59″ wide so I decided to cut my squares 5″ by 5″. I laid the fleece out so that it was straight on grain and trimmed up the cut edge to make sure that it was completely even. (Sometimes they are in a rush at the cut table and the fabric can be cut really wonky.) Next I cut a 5″ strip of fleece. Then I cut of the selvages and cut 5″ squares from the strip. You want to make sure that your squares are as perfectly square as possible to start. Not all of mine were when I got to sewing so some had to be cut down to more squared. It’s also really important that they are all relatively the same size. Mine were all within about a 1/16 of an inch to each other and I called that close enough.
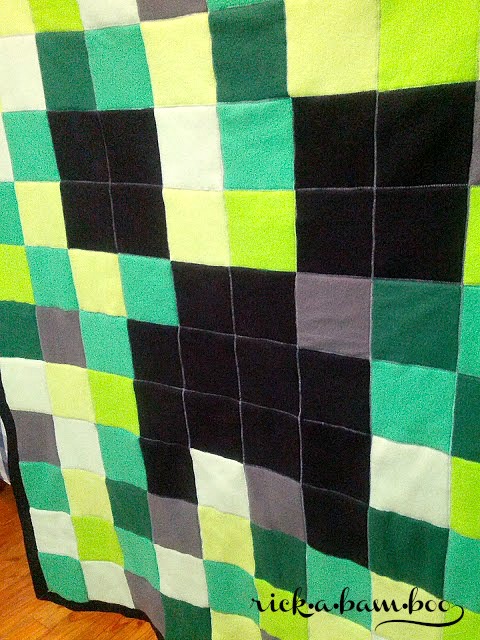
I sorted them out using Katherine’s color chart as a basic guide. I did move mine around some because I didn’t want two of the same color right next to each other. If you have a good area you can lay out all the squares and move them around until they are how you want. If not, you can just stack them up according to the chart and move them around as you sew each row on.
When I was ready to get sewing I laid out all the black that I had left and found the center. Then I took the two middle rows and pinned them down starting in the center of the backing and worked my way out. I lined each square right up next to each other with no overlap, matching up the corners as evenly as possible. Once the two rows were pinned on I zig zag stitched them together and to the backing, running across the blanket. I used gray thread on top and black in the bobbin. I had the machine set to the widest zig zag and had the stitches fairly close together. A walking foot is a must for this project. It could be done without it, but the walking foot really helps keep the fleece in place and keep a nice even pace as you’re sewing.
I continued by pinning on one row at a time, working my way out from the center of the blanket. Once I had all the rows sewing on it was time to stitch the columns. This part went much faster since there was no pinning required. All the squares are already stitched into place, so I just met the edges up as I sewed the columns instead of pinning. When the columns were completed I stitched all the way around zig zagging off of the edge of the outside squares.
Then it was time for the finishing touches. I trimmed all the extra backing off leaving 3 inches around. I cut the excess off for mitered corners, but you easily skip that. I folded the edge of the backing to meet the edge of the squares and zig zagged over where they met to stitch the top together with the binding. Then I stitched over the mitered corners. Finally I admired the finished product.
The nine-year-old was as excited about it as nine-year-old boys get. “It’s a creeper!!!” And then he went back to playing Minecraft. I consider that a success. Do you have a minecraft lover in your life?


Big success! I think it turned out great and I know he’s going to love having it.
im considering this, but i do not have a sewing machine. how long did the blanket take you? and if i do the sewing by hand what should i keep a look out for? im trying to make a surprize for my 9 year old nephew and think he would love this!!
It took me 3 days total. I cut it all out on day 1. Then two days of sewing. If you’re going to do it by hand I would definitely keep an eye out for bunching. Another thing you could do is get some spray quilters adhesive and “glue” a few squares on at a time so you can hand stitch them. The adhesive washes out when you wash your finished project, so it’s a great way to keep things in place while you’re working.
I have a question on the backing..did you use the same as front or solid backing? Is it one or two layers of the fleece?
I used the same black fleece for the back as I used on the front. So it’s a total of 2 layers of fleece. The solid backing and the pieced front.
This is clever. It’s funny how certain children that we know closely can just talk and talk forever about this game. I know- I have one! I bet he loves this quite a lot!
What size bed does this pattern “fill”
I would say probably a full size bed. My finished product was about 55″ wide and 60″ long.
Love it. I have a grandson who would love this. Do you ever make these and sell them or no anyone who would?
Thank You
Darlene panelli
I currently do not make these to sell, but I would recommend checking around etsy.
My son would absolutely love this, but I don’t sew 🙁 would I be able to purchase one? If so how much? It would be an excellent Christmas gift!
Unfortunately, I am not currently selling these blankets. With a new baby on the way in less than a month, I simply don’t have the time right now. But I will add it to my idea list of things for next year.
Did you use a regular sewing machine or a serger? If regular, there is not a lot of space between the needle and the body of the machine, so was it hard squishing in all the fabric while sewing the columns/rows? I bought all the fleece, but I only have a regular machine, so I am trying to figure out how to sew it all together. Thanks.
I just used a regular sewing machine. There isn’t a ton of space in the throat of the machine, but I just folded/rolled it up to make it all fit. And I always kept the bigger half of the blanket outside the machine. Hope that helps. Happy sewing.
Thanks for the absolute BEST online tutorial I have ever run across for ANY project. You added so many wonderful hints and suggestions, right down to materials (and amounts) needed. I felt I had you standing over my shoulder guiding me all the way. I am not a seamstress, by any means, not really even a sewer, but I got through it and presented a wonderful blanket much appreciated by my new nine year old grandson. Any mistakes made were strictly my own (duh!), but were covered up or sewn over. Thanks so much.
Thank you Betsy. That is so sweet of you to say. I am glad that you were able to recreate the project for your grandson. I hope that he loves it.
Thanks my 5 year old nephew would love this!