
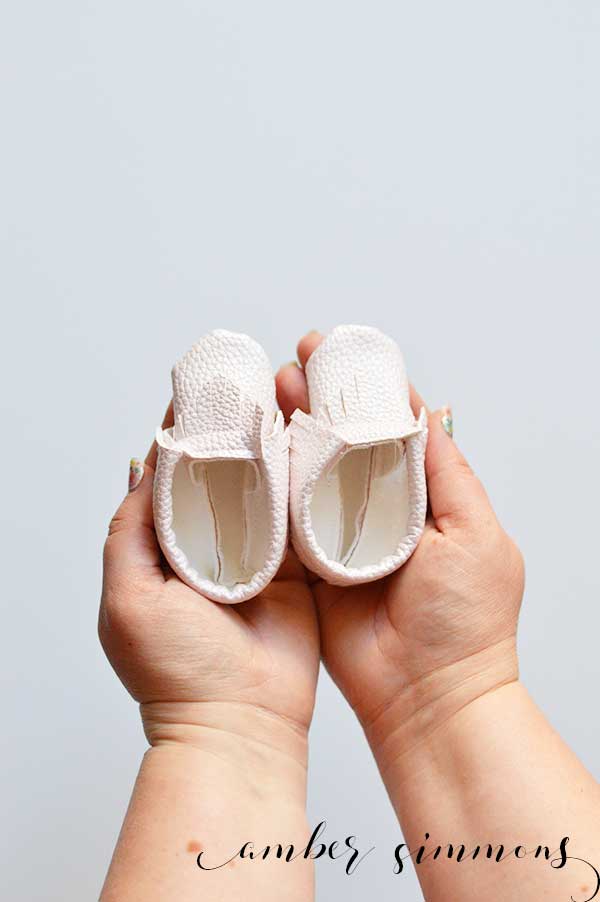
Whip up some cute faux leather baby moccasins by using the Cricut Maker to cut them out. All that’s left is the quick assembly process.
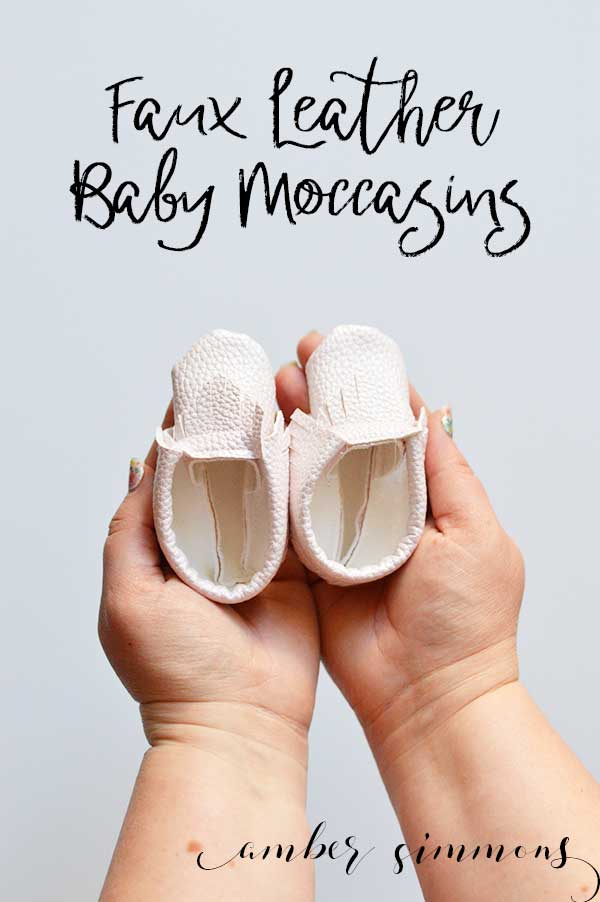
I’m babying it up once again to make these cute baby moccasins with my Circut Maker.
You might have seen the other cute baby stuff I have made including the ruffled flower baby turban, the top knot baby turban, and the giant bow headband.
Supplies
Faux Leather Ribbon
1/4″ Elastic
Cricut Maker
Cricut Maker Rotary Blade
Fabric Grip Cutting Mat
Binding Clips
Straight Pins
Sewing Machine
Baby Moccasin cut file
How to cut faux leather with the Cricut Maker
I used the Pearl Pink faux leather ribbon from Hobby Lobby to make these cute little moccasins.
Since that ribbon is only 8″ wide I moved the pieces around in Design Space before I pressed cut to make sure they would all be on the faux leather ribbon.
I placed it face down on a nice sticky mat and pressed it down really well.
Then I chose the metallic faux leather setting and using the rotary blade, cut out the moccasin pieces.
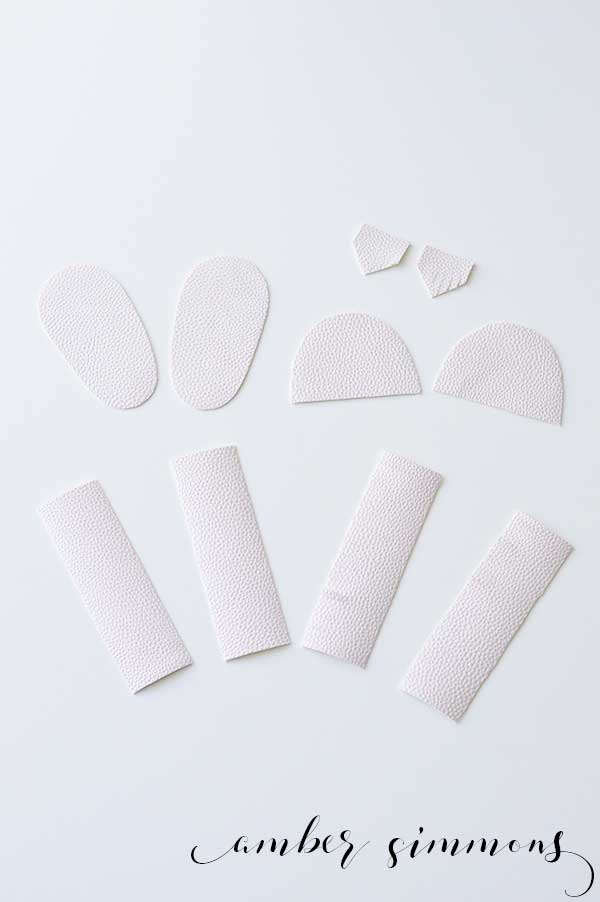
Once they were cut out it was time to get assembling.
How to sew baby moccasins
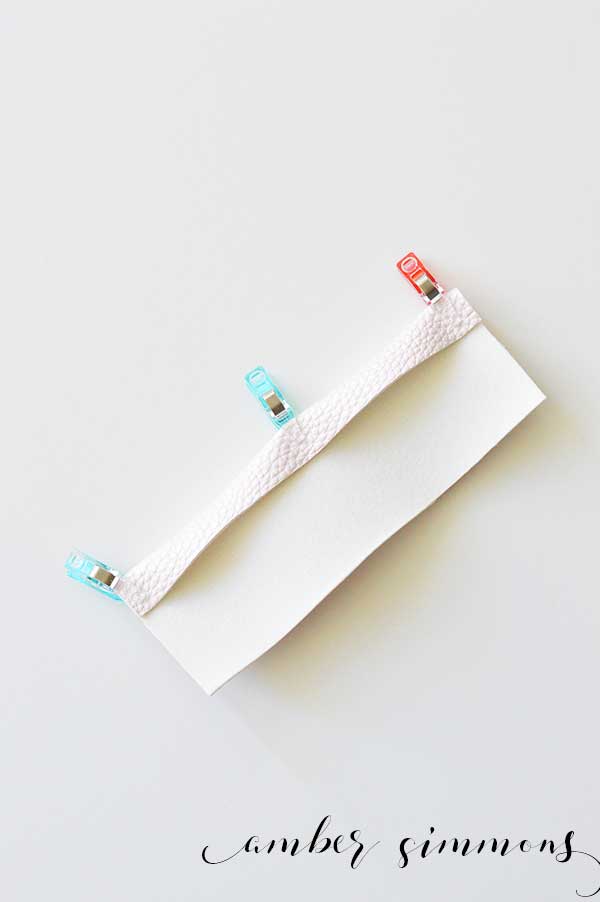
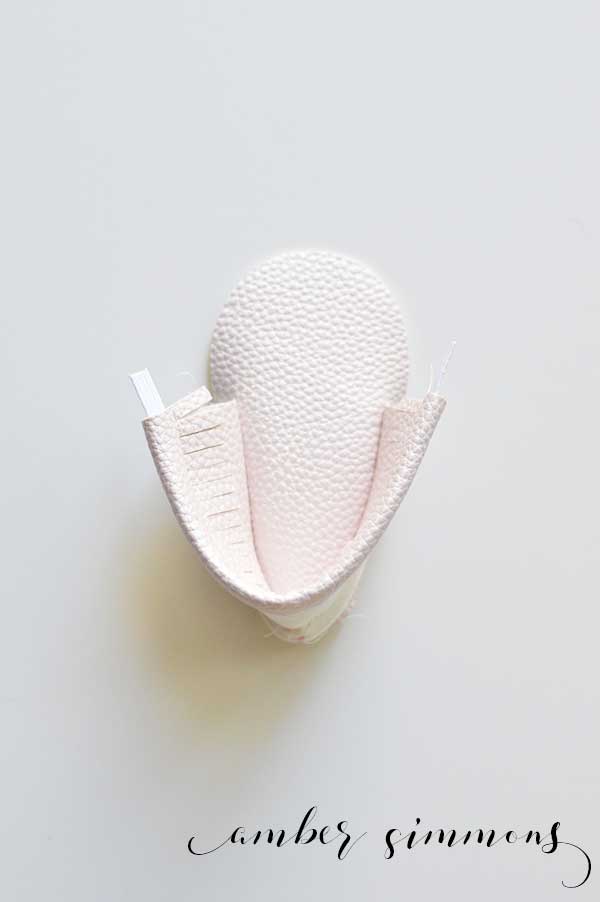
Take the flat heel piece and the fringe heel piece from one moccasin. Place the fringe piece on top of the flat piece, right sides facing up.
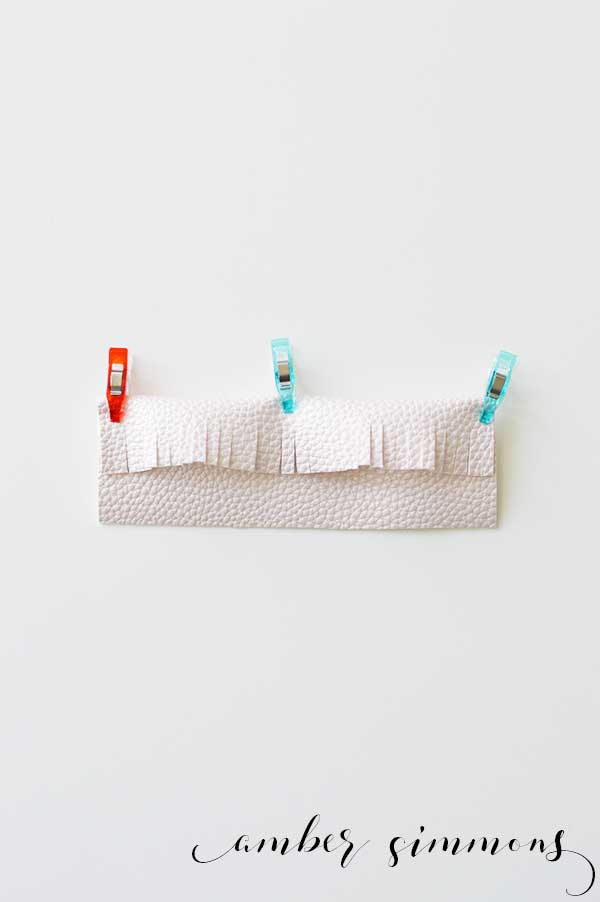
Then slide the fringe piece up so that you can fold the flat edge over the top edge of the flat piece. Using binding clips, clip into place.
You are making the pocket for the elastic so make sure that it’s not too narrow before you sew.
Sew along the edge on the back side of the moccasin. I did the fringe side down, so that I would be sure to catch all of the back edge.
Once it is sewn you want to use a small safety pin to pull a 7″ piece of elastic through the casing. Be sure to leave some hanging out of either end.
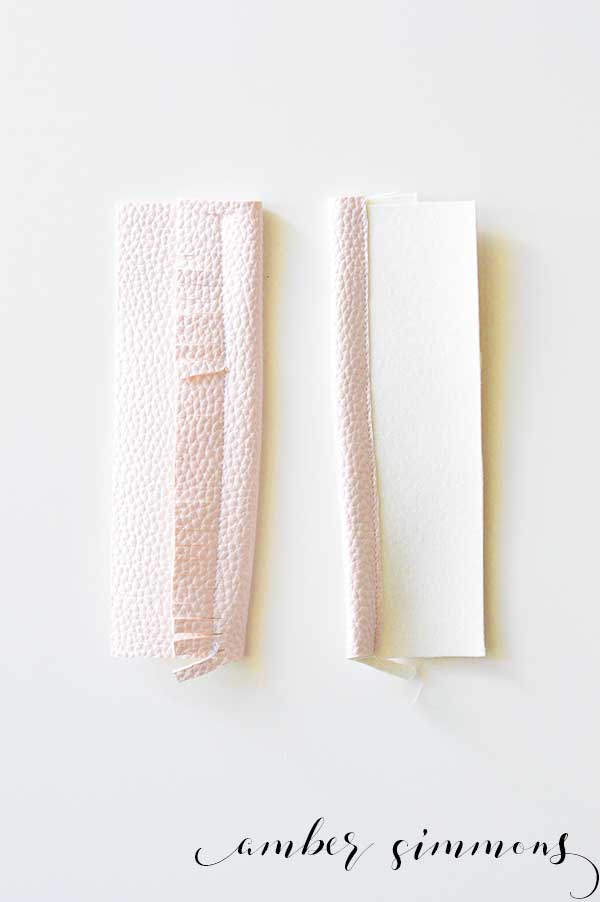
Repeat for the other shoe.
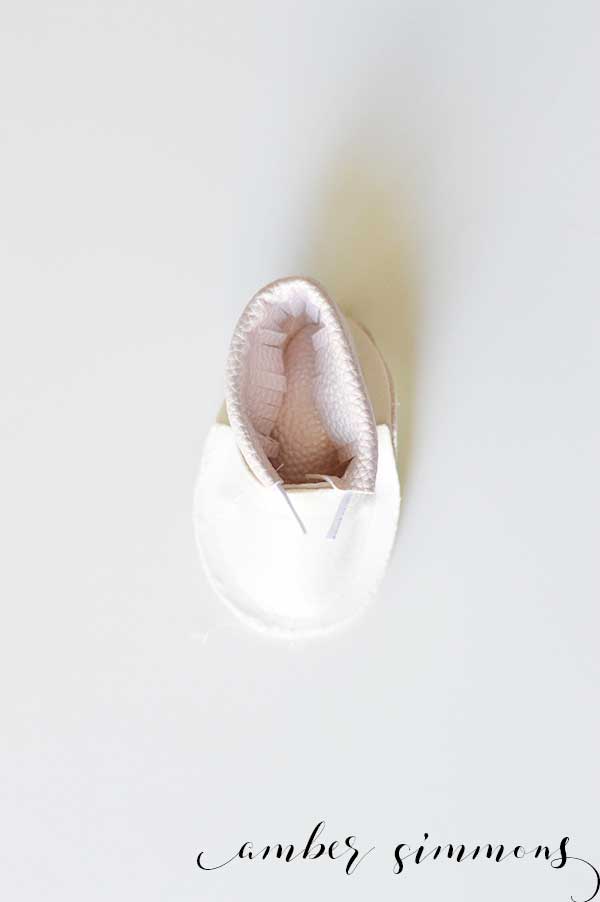
Next you are going to place the accent fringe on the top center of the toe piece. Right sides up.
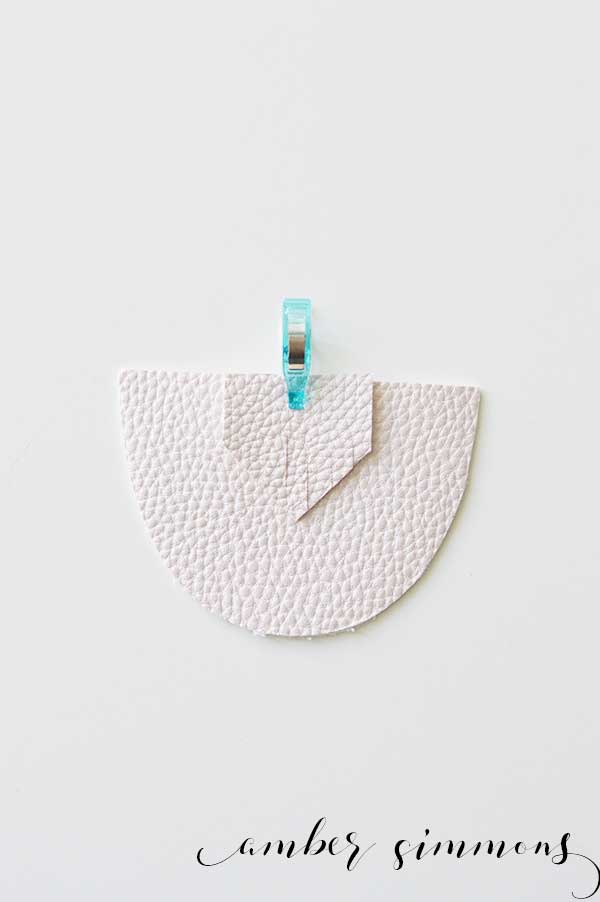
You want to stitch close to the edges as well as down by the fringe. You are creating another elastic casing so be sure that it’s wide enough.
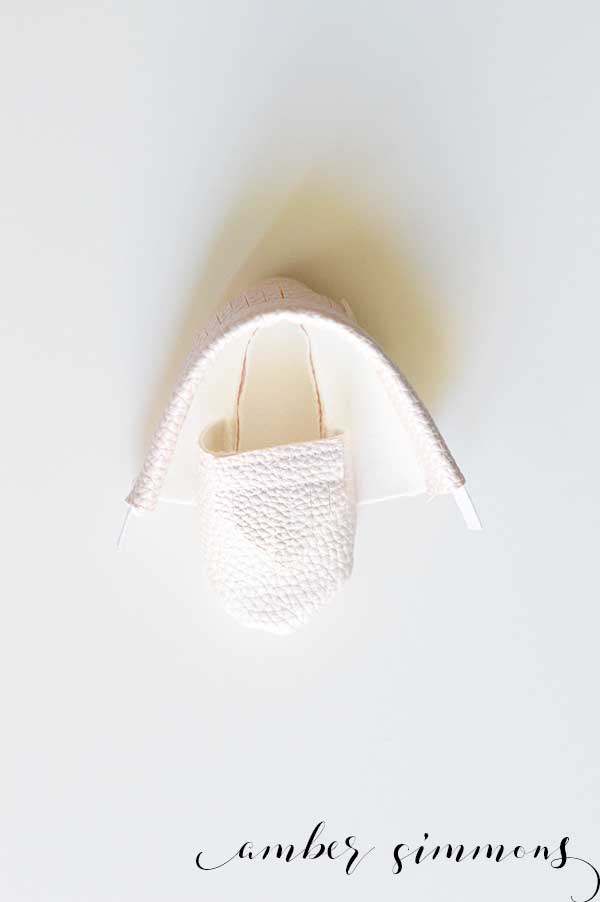
Now you want to take the bottom of the moccasin and the heel piece. Match up the center of the raw side of the heel piece and the center of the back of the foot, right sides together.
So fringe side down on the outside of the foot piece. I used a pen and made a small mark at the center of both of them pieces.
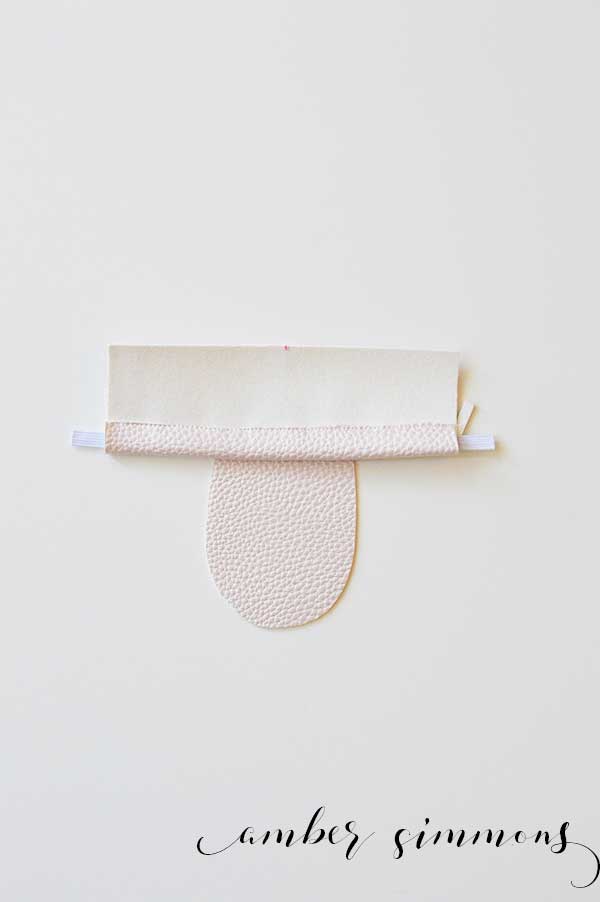
Place a couple of stitches in the seam allowance. Using straight pins, pin down the rest of the heel piece lining up the raw edges as you go.
Using a 1/4″ seam allowance, start at your stitches in the middle, sew around to the front.
Repeat for the other side. Then repeat for the other shoe using the remaining heel and foot pieces.
Take the toe piece and place it face down, lining up the center of the toe with the center toe on the foot piece. Put a couple stitches in to keep it in place.
Line the raw edges up with the foot piece and pin in place with straight pins.
Starting at the center stitches, use 1/4″ seam allowance to stitch around one side. Repeat on the other side.
Repeat the previous steps to add the toe piece to the other moccasin.
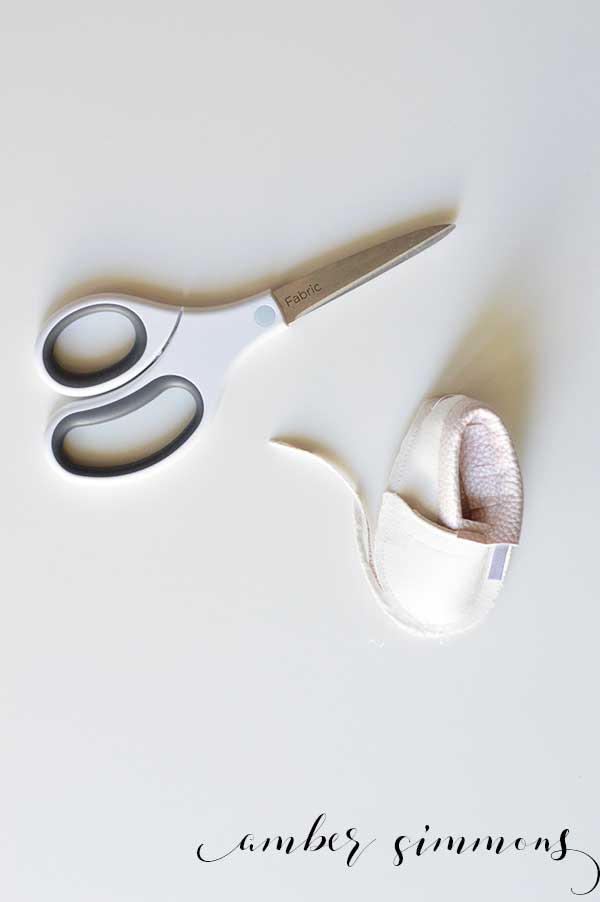
Trim any excess seam allowance around the entire outside edge and clip if necessary to prevent bunching inside the shoe. Be careful not to clip through any stitching.
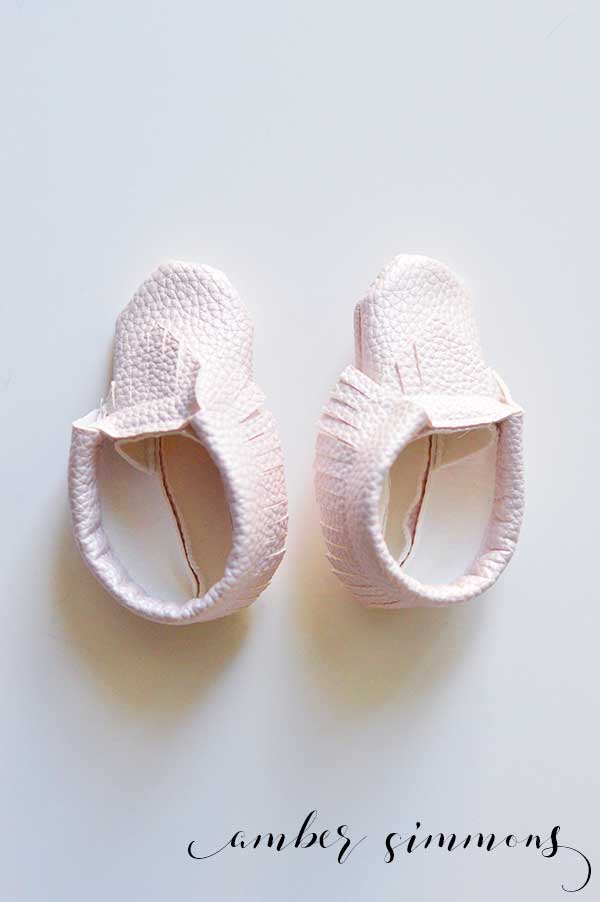
Turn the moccasins right side out.
Using the safety pin, pull the elastic through the casing on the toe of the moccasin.
Overlap the ends of the elastic 3/4″ and stitch together.
I like to stitch a square with an X through it went stitching elastic together. But since this is a baby shoe you could probably just throw in a few hand stitches or a quick zigzag and call it a day.
Once it is securely stitched in place, pull the elastic so that the overlapping section is pulled into the heel casing.
Repeat for the other moccasin.
That’s it! They are done! And oh so cute. These would look adorable on any baby’s feet.


[…] was at Hobby Lobby a while back and found some turquoise faux leather ribbon. I didn’t know what I was going to use it for but it had to come home with […]